Wednesday April 7, 2021
By Trevor Ross
 Growing
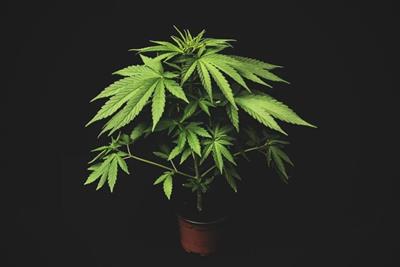
Jugglers will tell you that if you can toss one ball, you can juggle. And they’re not wrong. Similarly, if you can grow a single marijuana plant, then you can produce a rotating crop, too. The trick, like juggling, is timing. So let’s review the timeline for growing cannabis to see how best to juggle multiple plants and ensure a steady stream of home-grown medicine.
First, consult your local laws regarding how many plants you may keep, both in total and at a given stage. For instance, individuals in Colorado are allowed up to 6 plants, with 3 in the flowering stage at any time. In medical-only states, like Pennsylvania, growing is not allowed at all. Also be aware of the legal possession limits in your state; you’re about to produce a lot of marijuana.
The potential harvest from each plant can range widely depending on a dozen interconnected factors, but it’s safe to assume that a good plant, given a good effort, and free from disease or mold, can produce between .5 to 1 pound of consumable marijuana. Start doing the math for how much you smoke and how often.
Photoperiod Plants vs. Autoflowering
A “photoperiod” is the period of time that light (from the Greek root “photo”) is exposed to something. A photoperiod is what sets the default life cycle for most plants (naturally done by the sun, or artificially done with grow lights), and for the sake of this article, we will discuss primarily photoperiod cycles.
Autoflowering plants do not rely on the sun or artificial light to initiate their flowering process, but are genetically designed to enter the flowering stage automatically after a certain duration of time (usually 2-4 weeks).
Such plants are convenient for growers with less control over their lighting, or growers who just want to automate as much as possible. The downside, as it often is with automation, is less control over the process at each step. Current autoflowering plants can be expected to produce smaller and less potent yields, but are still a good option depending on your needs. If quicker timetables play into your growing plans, or you need a smaller crop to fill a gap in production, these can be a great option to help keep your plants in constant rotation.
Timeline for Growing a Marijuana Plant
Plants are organic living things, so it is important to remember that there will always be some variance in the time table presented below. Some steps might happen a little faster, some a little slower. From strain to strain, harvest to harvest, and plant to plant, each grow attempt might have subtle differences, but this should serve as a good starting point for most non autoflowering seeds, which you can then adjust accordingly.
Germination ~1 Week / Week 1
The process begins by getting your seed to crack. The paper towel method is the easiest and most reliable method for germination.

Germination is the first stage in the cycle of growing your own cannabis plant. photo credit
You can also buy seedling containers with lids for humidity control, or you can just drop them in the dirt and let nature act. Leave the tender little thing alone for a week and it will pop when it’s ready.
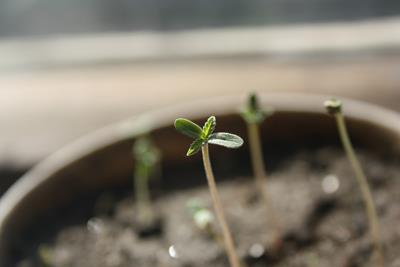
Seedlings ~2 Weeks / Weeks 2-3
Baby plants, like baby anything else, are critically sensitive to harmful factors like disease or pests, so keep your area as sanitary as possible.

It is important to pay close attention to your seedlings, because this is one of the most fragile stages. photo credit
Seedlings will want about 18 hours of blue-white light per day. Once they have developed their recognizable bladed leaves, it’s time to transplant them to a bigger, permanent home.
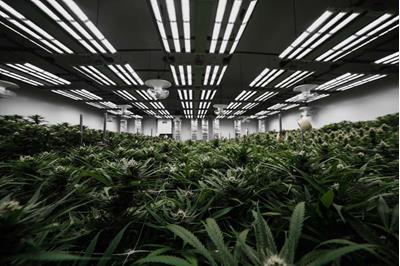
Vegetative Stage ~2-8 Weeks / Weeks 4-12
“Vegetative” simply means your plant is growing vegetation and lots of it. Photoperiod plants rely on light cues to grow differently. Because of this, they can be kept in this vegetative stage for about as long as you’d like, growing large and leafy until you decide to flip the switch into flowering. Remember, plants can double in size during the next stage, so plan accordingly.
Keep your plants between 70-85 ℉ during this stage, and make sure they get plenty of nitrogen. This is also when many growers begin to manipulate the size or shape of the plant with strategies like high- and low-stress training, “topping,” or cultivating a “Screen of Green” (ScrOG), among several others.
Canna-Tip: If you want to optimize your growing cycles, then now is a good time to cut some clones. Clones are severed cannabis branches that can be planted to produce another plant with the same genes. This also allows you to bypass the germination phase, which can speed up your growing process. You can learn more about cloning here.
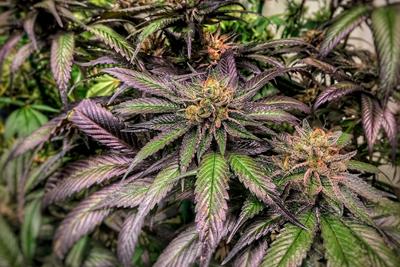
Flowering Stage ~6-12 Weeks / Weeks 12-24
When you’re ready to start producing buds, reduce the light to 12 hours per day, introducing amber light, if possible. This tells your plant winter is approaching, and it’s time to flower and reproduce (but for growing purposes, don’t reproduce! More on that in a moment.).

The plant will finally being to develop buds in the flowering stage. photo credit
Reduce temperatures to 65-80 ℉, and switch to more flowering-supportive macronutrients like phosphorus and potassium. Stop your nutrient regimen about two weeks before you harvest, feeding it plain, clean water during this final stretch. This will flush residual salts and nutrients from your final product. It is also recommended that you prune lower or fewer branches throughout this stage, to focus all energy and nutrients on t bud production. These cuttings can also be used as clones to begin a second (or even third) round of plants behind these.
Canna-Tip: Cannabis is not a unisex plant, so you can grow males or females. Male plants do not produce buds, and fertilized female plants produce smaller buds full of seeds. So the goal of growing is to cultivate only female plants and to make sure they’re never pollinated. Male plants will develop pollen sacs that appear like small clusters of grapes. If you find these, remove the plant from the system before it pollinates your females. Females, on the other hand, will grow wispy hairs called “pistils,” that will grow in white and likely fade toward orange as the plant matures.
Harvesting and Drying ~2 Weeks / Weeks 24-26
When it’s time to harvest, look to the trichomes, most of which should be milky white. Consider a USB microscope or anything that helps you zoom in for a close look at the tiny glands. Most growers will harvest when about 60% of the trichomes are visibly milky. As trichomes continue to mature they will take on an amber color, as the THC converts to CBN, giving them a more sedative effect. What combination and when to harvest is entirely your choice.

Inspecting the trichomes of your plant will ensure you are harvesting at the optimal time. photo credit
Next, you will need to trim your buds of pistils and remaining leaves. This can either be done immediately after harvesting (wet trimming) or between drying and curing (dry trimming). If you trim wet, plan on wiping and saving the valuable “scissor hash” that will inevitably gum up your blades.
Hang your harvested cuttings upside down in a dark room. After 10-14 days, when the twigs are brittle and easy to snap, your cannabis is dried and ready to cure.
Curing ~4-8 Weeks / Weeks 26-34
When the buds are dry, move them into airtight containers (usually mason jars), filling them no more than three-quarters full. The excess air will need to be released – or “burped” – to vent natural gasses that collect during the process. Burp your jars twice a day for the first two weeks, then about once a day after that. Check each piece for fibrous mold and discard any you find before it can spread.

Curing is the final stage before being able to smoke your home-grown bud. photo credit
It is strongly recommended that you place a hygrometer in your jars to monitor the humidity levels within. High humidity can become a breeding ground for mold, and low humidity can result in brittle buds. Keep the jars in a cool, dark space. You can learn more about the curing process here.
Conclusion
If you’ve been keeping score of the weeks besides each step, you may have tallied up 8 months of work, but the minimum is also a mere 15 weeks. And this is where you decide the solution to your math: how many grams can you expect to smoke in how many weeks? And how much can you expect to harvest? With your range of timelines in mind, how soon or late you begin the next rotation of plants will be dependent on your personal consumption and needs.
Some growers may decide that autoflowering plants are their better option, as they can go from seed to harvest in only 8-10 weeks. Or maybe you prefer a bumper crop that you smoke over several months. The choice is yours, and there is no wrong answer. All that’s left is to begin.
Do you have tips for keeping a good crop rotation? Share them in the comments!
Photo Credit: OpenRangeStock (license)