Sunday December 19, 2021
 Education
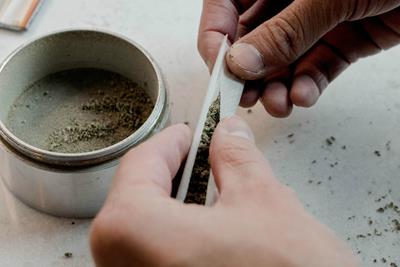
Using our handy step-by-step video guide, anyone can learn to roll a good joint, but some who’ve tried their hand at rolling come away dissatisfied. “Why doesn’t my joint look like the one in the video?” they wonder. While rolling dried herb into a paper tube may sound like a simple task, the devil is in the details. If any element is wrong it can ruin the joint, thus ruining the smoking experience and potentially wasting your precious cannabis. As a result, many who find joint rolling difficult are hesitant to devote more time, energy and resources to perfecting the craft, despite wanting to get better. If that sounds like you, fear no more, the PotGuide team is here to help!
Table of Contents:
Common Beginner Joint Rolling Problems and How to Fix Them
We receive a lot of emails from readers looking to improve their joint rolling skills. Before delving into the tips and tricks below, if you haven’t already viewed our video on how to roll a joint, take a few minutes to watch it and familiarize yourself with the basic technique. From there, use these tips as a guide to refine your skills and become a joint rolling master!
Keep reading to learn some of the best trouble-shooting tips to help up your joint game and get to that next level of rolling perfect joints, every time.
Loose Roll
Many new joint rollers are timid with handling the paper, and err on the side of a looser roll in order to avoid tearing the paper. Until you get a feel for the tensile strength of your chosen papers (and different materials will certainly have different strengths), accidentally ripping through one like the Hulk wrapping a Christmas present is a common occurrence.
To overcome a loose roll, practice your skills with a stronger rolling paper before moving to more delicate papers.
Zig-Zag Kings are a durable alternative, with a lot of paper to work with for inexperienced hands (the least amount of paper possible is the preferable way to roll, but consider these training wheels that can be staged down over time).
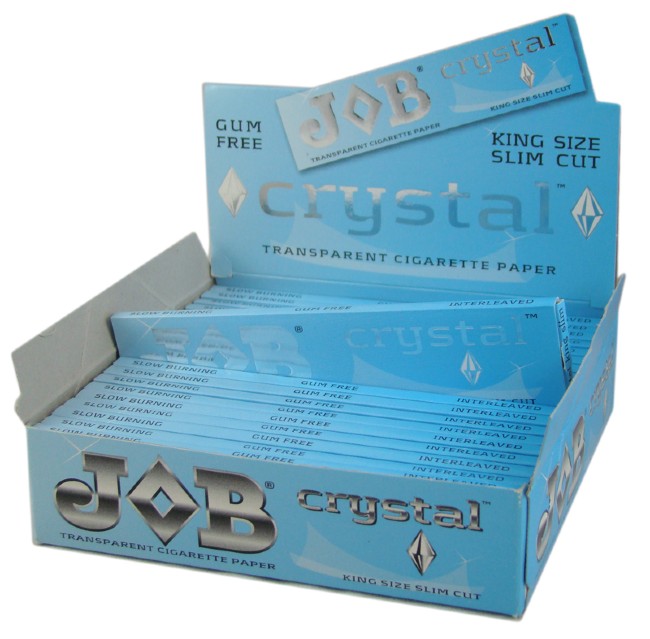
We recommend rolling with JOB crystal rolling papers for beginners. photo credit
Another creative option to learn on is JOB Crystal rolling papers. A cotton-mallow clear paper, these have the appearance of clear plastic (despite not being plastic at all), and are very sturdy.
The transparent paper also allows you to see the bud inside, which can help to better understand defects in your roll, such as uneven distribution (more on that below) or if you’re messing up the tuck before the final roll.
JOB Crystal papers are a bit rare to find in stores these days, so you might need to consult a specialty smoke shop or look online. Any similar cotton-mallow papers will also work.
Uneven Packing
A bump in the middle of the joint with two divots on either side, commonly referred to as a “burrito,” is the telltale sign of a novice joint roller. This distinct shape is caused by space between where our thumbs’ range of motion ends, resulting in an uneven filling. The most basic way to combat this is to be aware of it, and to adjust your grip when packing and preparing for the rolling step, focusing on keeping an even shape.
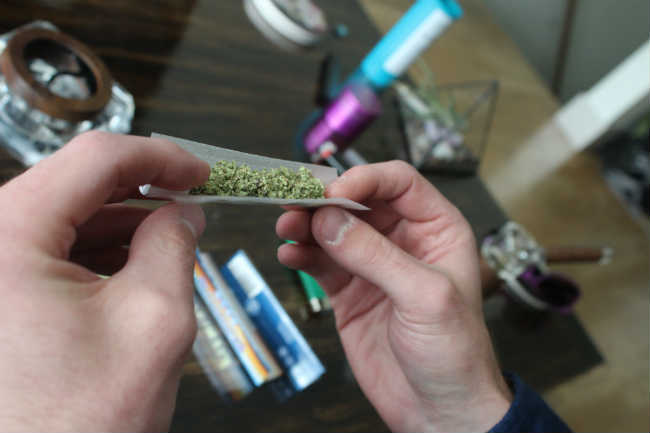
Make sure your grip is even and consistent while rolling.
As most people roll their joints from crutch to tip (though you can go either way, roll, however, works for you), it is natural for flower to push towards the open end. Pause to make sure your cannabis is evenly spread inside the paper before you begin your rolling motion to fix this issue, if it is, adjust it, then finish.
Loose Tip or Crutch on the Joint
Many people struggle to keep tips or crutches properly in place with a firm seal, and may avoid using them altogether. However, rolling with tip/crutch is always recommended, as it mitigates heat and keeps flower in place. Most hand-rollers favor the zig-zag crimp; reliable to hold flower back from even heavy drags, and easy to adjust to size.
To fix this issue, when rolling the joint, hang a third of the tip out of the end, and proceed to roll the joint as usual. After the joint is rolled, simply push the tip flush into the joint to create a well packed seal. It really is that simple, and will make a world of difference.
Keeping The Joint Together
The hardest part of joint rolling is perfecting the final roll motion, the moment of closure. This is the hardest part to acquire proficiency in and will rely the most on dexterity. Our first suggestion here is to go slow. People tend to rush at this stage, because the process is almost over and they are nervous about keeping it all in place. Remember to take a breath; you can do the roll as slowly as you like, paying attention to each stage to make sure it’s going how you want it.
Never settle! If you have a bad roll, simply start over again.
Got a bad start? Don’t commit to it, go back and try and adjust the tuck to your liking. It’s always a good idea to practice this step without finishing the joint (licking and sealing it). As you grow more comfortable with joint rolling, you’ll realize they are fairly stable and durable. Gently pulling outwards on the ends of the paper as you go can help maintain a taut roll.
Trouble Shaping a Cone
If you prefer to roll conical joints, but find that you’re having trouble getting the shape symmetrical, an easy fix can be to fold yourself some guide rails.
With the joint laid flat and the glue strip positioned facing towards you at the top, make a diagonal crease at the top and bottom: one starting from the lower far corner to the center of the middle of the opposite end where the tip will be, and another starting from the far upper corner to the same point. The creases will help the bud naturally fall into place and be prepped for the roll.
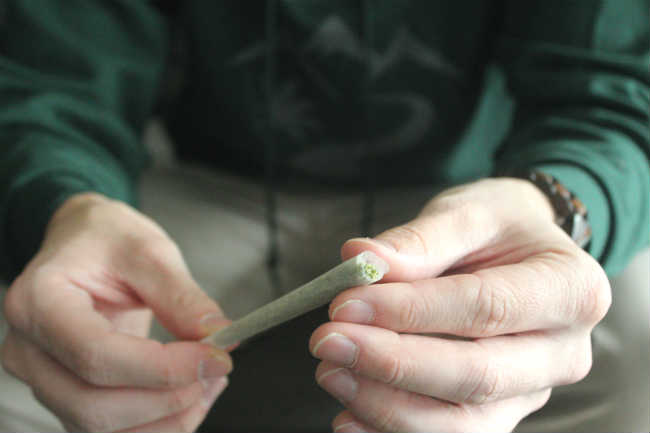
Uneven Cone End
A small twist at the tip of the paper can help compact the bud and seal off a joint. However, those new to rolling tend to get a bit overzealous on the twist, and wind up with a bulging, flower-packed end that will burn a good amount of product to ash before giving a good draw.
This also has a tendency to make the joint canoe or run.
If you find this a common problem with your joints, the Pacific Northwest has taken to solving this issue with the divot tip.
Instead of a large, tight twist, pinch the open end of the joint paper together, give a small turn, then compact the excess paper into the end of the joint, pressing in just slightly to make an indentation.
This should take a light touch, so as not to bend the joint. When lit, this will form a more even cherry with a smooth draw. If divot tips aren’t working for you, fill in the joint with more flower before twisting it off, or to cut the paper to a shorter size, and focus on keeping the shape symmetrical.
Final Notes
Of course, joint rolling takes practice. At the end of the day, it’s better to waste rolling papers than to waste flower. So, if you roll a joint you’re displeased with, don’t hesitate to rip that little guy open and start again. Many times, the general shape of the joint will remain intact, and is easily transferred to a new paper. You can add flower to bolster parts that need it, or fluff the whole mess up and start again.
It’s also important to remember that there are many different ways to roll an effective joint and that everyone has their own techniques. Feel free to use the tips above as guidance for your joint rolling journey, but if you find other methods that serve you better then by all means use them!
As you progress in your skill with joint rolling, the key factor to nicer joints lies in improving the final rolling action. Work on getting down a smooth, controlled movement that feels even throughout. If you find this step difficult to control, try adjusting your grip until you find a more stable hold that works for you. It will come in time.
Until then, addressing any minor flaws along the way can elevate your beginner efforts into things of pride, eager to be shown off and shared with others. Happy smoking!
Frequently Asked Questions
Do You Need to Use a Crutch When Rolling a Joint?
A crutch isn’t necessary to roll a good joint, however, rolling with one will make smoking your joint easier to manage, while reducing heat and keeping bits of flower from flying out when you inhale. It also makes the joint easier to hold as it nears the end (avoiding the need of a joint or “roach” clip).
How Do You Shape a Joint?
Once the paper is filled with cannabis, hold it in both hands with your palms facing up. Pinch your fingers and thumbs together with the paper between them and work the paper back and forth to shape the cannabis into a cylinder.
If a joint won’t pull when smoked, it usually means it was either rolled too tightly, overpacked, or the weed was ground too finely to allow for airflow to get through.
Do you have any tips for beginner joint rollers? Share them in the comments below!