Wednesday November 17, 2021
By Trevor Ross
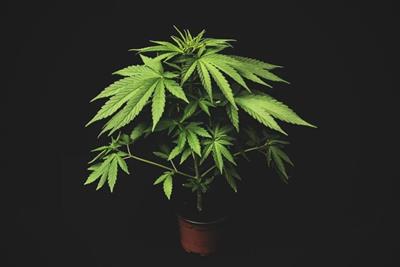
 Growing
Finding a seed in your bag of weed used to be regarded as an insult, an indication you scored some inferior product. But it’s a new millennium, and growing cannabis is perfectly legal in some states and territories. While buying seeds online is still recommended for reasons we will detail further, finding a healthy seed can be as valuable as an ounce of gold. Or at least the cost of the bag.
In this article we review the steps to germinate cannabis seeds, tips and tricks in the process, and how to keep your seedling healthy.
Germinating a seed is the first step in the growing process, and a cannabis seed will sprout with a voracious hunger, so if you are about to germinate seeds, start thinking ahead about where the seedling will eventually be moved to. This includes lighting, ventilation, and something to feed the lady. Those things don’t need to be decided before you begin, but try to have a plan in place by the time the second set of leaves emerges — as soon as two weeks.
Table of Contents:
The Germination Process
Begin by soaking the seed overnight. Soaking the seed saturates it with moisture, and moving it shortly after to a warm home tells the seed that it’s someplace comfortable, and it’s time to grow. Tap water is fine for this, but a micronutrient solution like liquid seaweed may be included.
Once your seed has soaked, the most common method for germination is the “paper towel method.” Wet a piece of paper towel and wring dry, then fold in half. Place the seeds between the halves of the damp paper towel, and slide the whole thing into a ziplock bag. Seal with some air inside. Leave this bag someplace comfortably warm for about a week, checking frequently for spots of mold. After about a week, a taproot should emerge.
Example of seeds undergoing the germination process.
Then it is time to transfer the seed into a proper growing medium. Be careful plucking your seed from the paper towel!
A grow medium is the “stuff” the seed will sit in. The easiest option is soil, healthy black earthy scooped up from your yard, or potting soil purchased from any garden center. Rock wool cubes are a common option for hydroponic growers, but can later be transplanted into soil as well. Compost and worm castings are great for a seedling, but it will need to be transplanted into a more diverse mixture later.
It is far too early to begin any nutrient cycle, or to introduce any fertilizers to the soil. Now that the seed is confirmed as alive, and placed into a more comfortable medium, simply make sure that the seed is watered and warm.

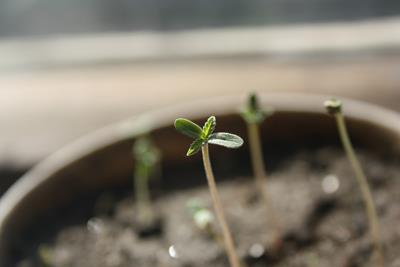
After germination, your plant will soon become a seedling. photo credit
The first set of leaves to emerge are called “sucker leaves,” and their sole purpose is to drink in as much light as possible to fuel the growth of the more recognizable serrated leaves, which will begin to grow over the next week. After that you’ve got a proper seedling, and in a few weeks it will be ready for a bigger home!
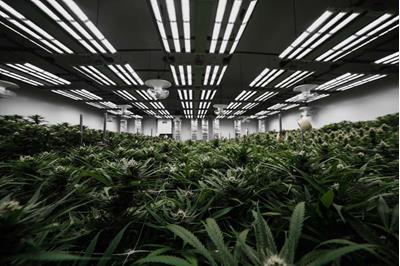
For further guidance and resources about growing cannabis, see our Beginner’s Guide to Growing Marijuana, or our guide to growing for personal use.
Cultivating a Healthy Cannabis Seedling
The seedling that emerges will be as tender as an infant, and susceptible to diseases and cross-contaminations, so keep your germination station as sanitary as possible, and wash your hands before handling them. Avoid rubber or latex gloves at this stage as they have too much grip, and one wrong movement of your finger could accidentally grab and tear the soft plant material.
A seed’s health may be fortified by soaking it with a solution rich in micronutrients, like liquid seaweed. Be advised, however, that these will be very diluted solutions. Carefully read the mixing instructions of any product you purchase.
Seedlings can be protected against certain diseases by including worm castings in the medium. Research out of Cornell University has shown the microbial life in worm castings colonizes the seed’s surface, making it more difficult for pathogenic microbes to establish themselves.
Disclaimers and Downsides Regarding Found Seeds
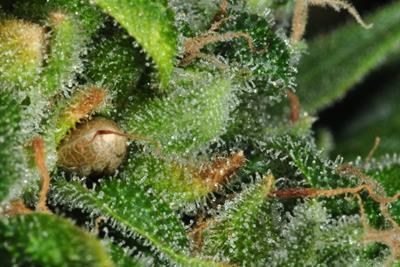
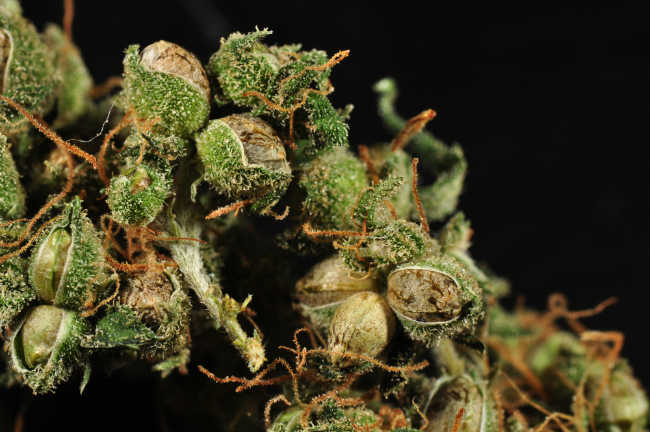
It’s worth pausing to remember that seeds shouldn’t wind up in your bag of cured, smokable cannabis. So before planting anything, let’s assess what this seed is, and how it got there.
Only female cannabis plants produce flowers, and if they are pollinated by male plants, then they produce seeds instead. So all the cannabis we smoke is from unpollinated female plants — or nearly all of it.
When female plants are stressed — for instance, by drought conditions or nutrient problems — an evolutionary alarm can induce them to produce seeds with only their DNA. The problem with these “hermaphrodite seeds” is that the offspring, having benefited from this process, will be more prone to repeat it. If this is how a seed got in your bag, it can result in seedy weed, even under the closest care.
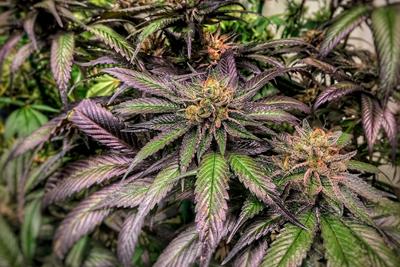
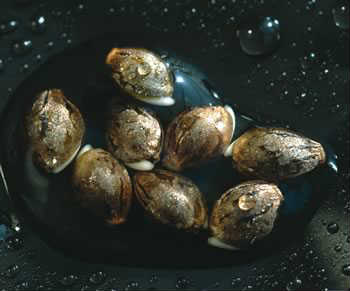
The characteristics of your seeds can drastically affect the outcome of your grow.
A seed is not guaranteed to sprout at all. Examine the seed for any obvious health issues. Immature seeds are lighter greys-to-green, while mature seeds are darker tan, brown, or even black. A healthy shape is a teardrop or nearly round, while bunk seeds will appear shrivelled or irregular. Finally, healthy seeds have a hard, whole shell, while cracked or brittle shells will likely not sprout, or produce a less healthy seedling.
A found seed is also not a guarantee to produce a replica of the strain you smoked, and may present latent traits from the strains it was bred from. Cultivating a complete copy of a phenotype is called “cloning,” and the cloning process must begin with a living plant, not a seed.
Remember, it could also just result in a male plant, which won’t grow any buds. None of this is guaranteed to happen with a bag seed, it’s just more likely than with a stabilized seed from a producer.
Summary
If you want to germinate a seed you’ve found, begin by soaking it overnight in water to saturate it, and soften the shell. Micronutrient solutions can be mixed in at this stage to fortify the health of the seedling (if you do, be sure to read the mixing instructions on the label).
The “paper towel method” is the most accessible way of germinating almost any seed. Once a taproot has emerged (after about a week) plant the seed into a small container with your chosen grow medium, like soil. Do not fertilize at this stage, as the seed and resulting seedling are very tender, and concentrated fertilizers are abrasive chemicals. Within another week, “sucker leaves” will sprout, synthesizing light to produce further growth.
Remember, found seeds are not always healthy or even viable. A healthy seed has a hard, unbroken shell and a dark color, while brittle or misshapen seeds may not produce a healthy plant, if anything at all. A found seed is also not guaranteed to replicate the precise phenotype of that cannabis you found it in.
That said, it’s almost always worth trying, and experimenting with whatever results. Growing cannabis can be an enriching experience, and perhaps even save you some riches. As long as you know what to look for from a seed, and how to handle them, finding one in your bag could be a golden ticket.
What do you do with your found seeds? Let us know in the comments below!